This tech doc shows how to create a simple file system backup on a desktop OS (Windows and macOS)
The links to your software downloads will be in your Welcome email. You can contact us at support@bobcloud.net

1. Logging into the desktop client
After the installation finishes, the software will prompt you for a login.
Enter the login details of the account you created in the portal.
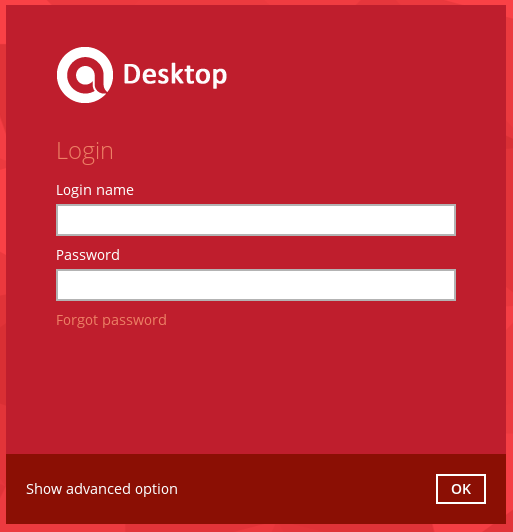
The software will connect to the backup cluster after 3 - 5 seconds.
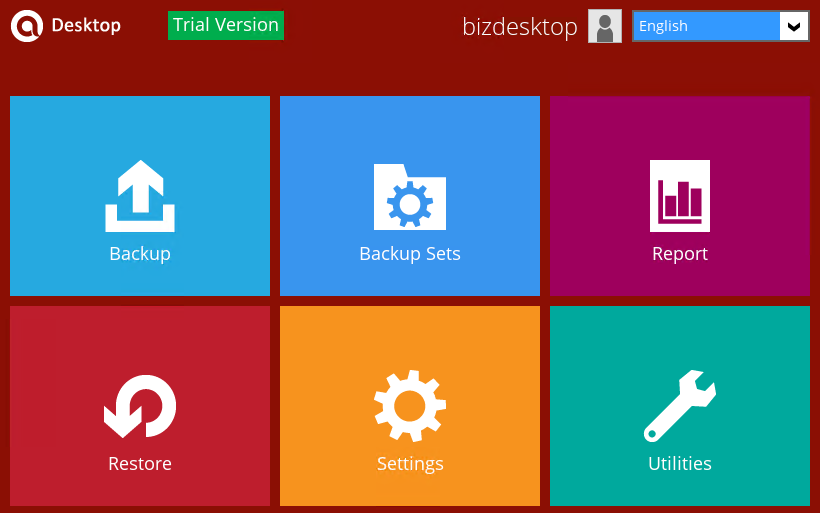
2. The software console
The Trial Version text reminds you that you have a 30-day refund option.
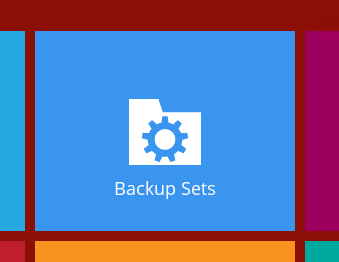
3. Create your first backup set
Click on the Backup Sets tile
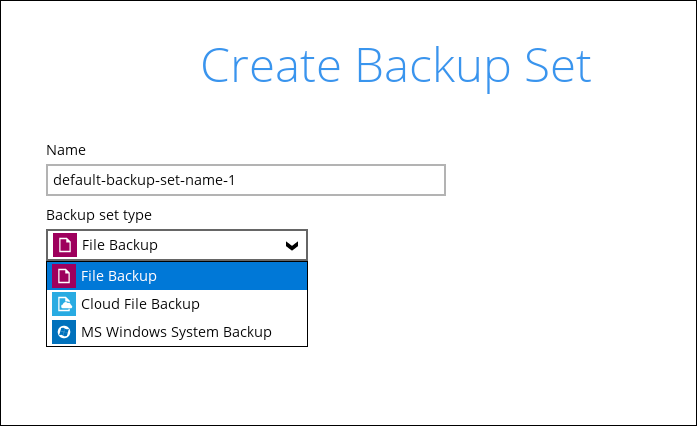
Add a new backup set

Choose from three different backup methods.
- File
- Cloud File (Dropbox, OneDrive, S3, etc)
- System (bare metal)
Select the File Backup option and rename the backup set if necessary.
Select the data you want to back up
The backup set is pre-configured to backup your data. You can deselect this and browse your device to select your source data.
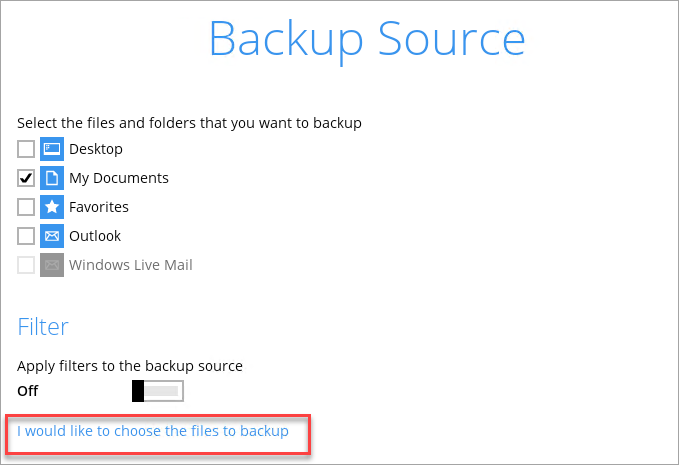
After clicking I would like to choose the files to backup, the Windows navigation screen will open, and you can select the files and folders you want to back up.
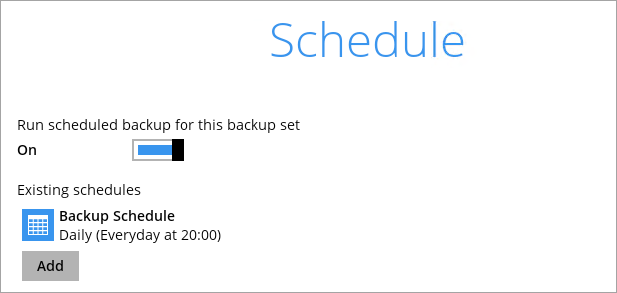
Backup Schedule
After confirming your backup source, the following screen displays the schedule. Each backup set is configured to run at 20:00, but you can change this.
Select where you want your backed-up data stored
The Destination screen will show our default storage location. If you want us to store your data, you can keep it or remove it and add your storage destination.
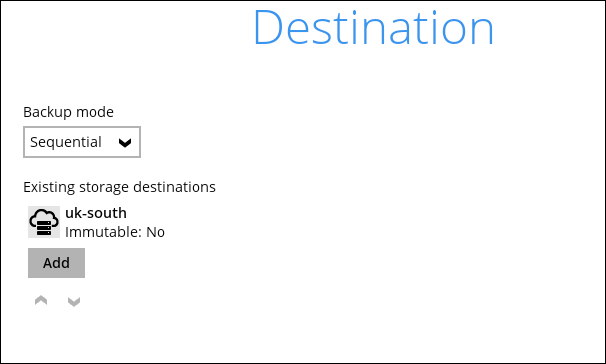
Click on Add to store the data on this backup set to multiple destinations.
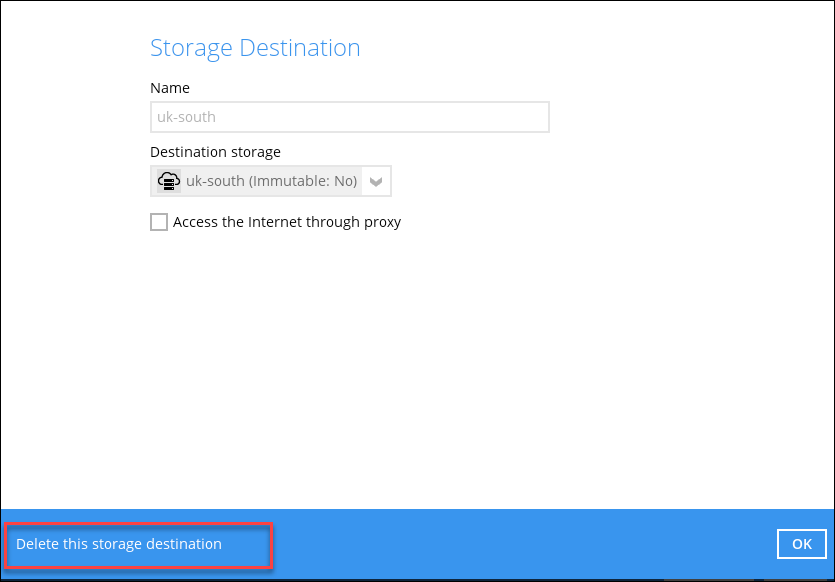
If you want to remove our storage destination, double-click on it and then click on Delete this storage destination at the bottom left of the screen.
Backup Set Encryption
The final screen is probably the most important because it contains your encryption password. The system is configured to use the same encryption password you used when you created this backup account (User password).
We recommend you don’t change this. If you change the encryption password, you MUST store it offline, where you can retrieve it afterwards. Remember, you might not need to restore your data for years!
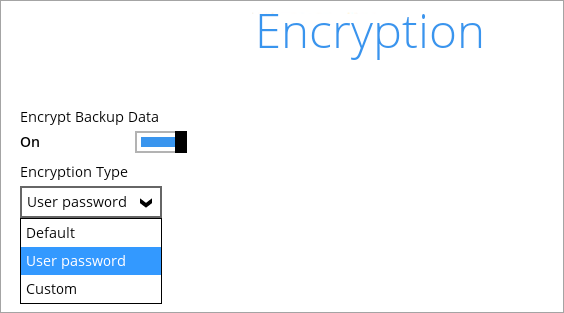
You can also choose Custom and enter your password.
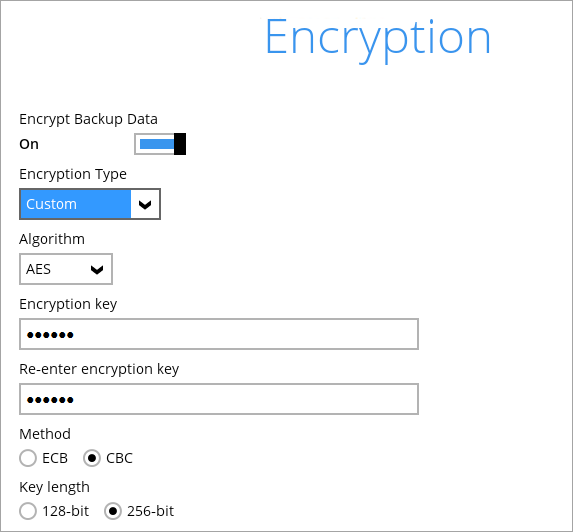
** NOTE: Whatever option you select, your encryption password will never be transmitted to us. We can never recover or reset it; if you lose it, you cannot restore your data.
Click on the backup button.